
Changing the oil in your car is one of the most essential tasks to keep your vehicle running smoothly. Not only does it improve engine performance, but it also extends the life of your vehicle. Many people think this is a job only a mechanic can handle. However, with the right tools and knowledge, you can change your oil at home and save both time and money.
Why Changing Your Oil Regularly Matters
Regular oil changes are crucial for maintaining the overall health of your vehicle’s engine. Old or dirty oil can lead to increased friction, overheating, and eventually costly damage to the engine components. Fresh oil lubricates the moving parts, reduces wear, and helps the engine operate at an optimal temperature. When done on schedule, oil changes can increase fuel efficiency and prevent breakdowns.
Tools and Materials You Will Need for an Oil Change
Before starting your oil change, it’s essential to gather all the necessary tools and materials. Having everything on hand will ensure the process goes smoothly without unnecessary interruptions.
- Oil Filter Wrench: This tool is designed to remove the oil filter.
- Oil Drain Pan: You’ll need this to catch the old oil as it drains from the engine.
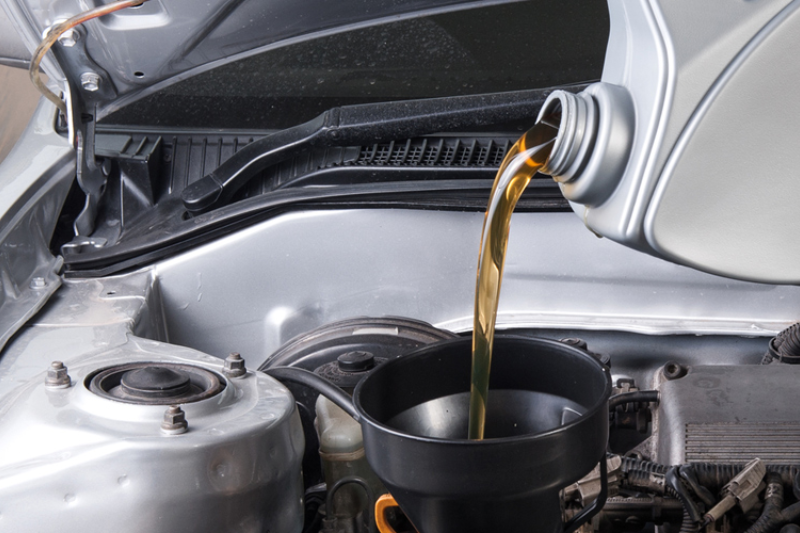
- Funnel: Helps in pouring new oil without spilling.
- New Oil: Check your vehicle’s manual to know the correct type and quantity of oil.
- New Oil Filter: Replace the filter every time you change the oil.
- Socket Wrench Set: Used for loosening the oil drain plug.
- Car Jack and Jack Stands: Safely lift the vehicle to access the oil drain plug and filter.
- Rags or Paper Towels: For cleaning up any spills or mess during the process.
Preparation Before Changing Your Oil
Before getting started, there are a few important preparations to ensure everything goes smoothly. Begin by parking your car on a flat, stable surface. Avoid any inclines or uneven areas, as this can create a hazardous environment when using a jack to lift your car.
Ensure the engine is warm, but not hot. Running the engine for about 5 minutes allows the oil to become warm, making it easier to drain. However, avoid a fully hot engine, as the oil will be too hot to handle and could burn you.
Step 1: Safely Raise the Vehicle
The first step in changing your oil involves getting access to the oil drain plug and filter underneath the vehicle. Using a car jack, lift the front end of the car, then securely place jack stands underneath to support the vehicle. Double-check that the car is stable and won’t move during the process.
Step 2: Locate and Remove the Oil Drain Plug
Once the car is securely lifted, slide the oil drain pan underneath the oil drain plug. Using a socket wrench, carefully loosen the drain plug. Oil will start draining immediately, so be ready with the pan to catch the used oil. Allow the oil to completely drain from the engine, which can take a few minutes. Make sure not to lose the plug during this process, as you will need it later.
Step 3: Remove and Replace the Oil Filter
After the oil has fully drained, locate the oil filter. Depending on the make and model of your car, this could be located in various places, so check your vehicle’s manual if you’re unsure. Use the oil filter wrench to loosen and remove the old filter. Expect some oil to drip out as you remove it.
Before installing the new filter, take some fresh oil and rub it along the rubber gasket of the new oil filter. This ensures a good seal when you screw it back into place. Hand-tighten the new filter and give it a slight turn with the oil filter wrench.
Step 4: Reinstall the Oil Drain Plug
Now that the oil has drained and the filter is replaced, reinstall the oil drain plug by hand, making sure it is snug. Use the socket wrench to tighten it, but avoid overtightening, as this could strip the threads and cause leaks.
Step 5: Add the New Oil
With the drain plug secured and the filter in place, it’s time to add the fresh oil. Remove the oil fill cap located on top of the engine and insert a funnel to avoid spills. Slowly pour the recommended amount of oil into the engine (refer to your vehicle’s manual for the right oil type and quantity). Once you’ve added the oil, replace the oil fill cap and wipe away any oil that may have spilled during the process.
Step 6: Check Oil Levels and Look for Leaks
After filling the engine with fresh oil, it’s important to check the oil level. Use the dipstick to ensure you’ve added enough oil, but avoid overfilling. After checking, start the engine and let it run for a couple of minutes, then turn it off and inspect the area around the oil drain plug and filter for any leaks.
Once you confirm there are no leaks, lower the car back to the ground and dispose of the old oil properly by taking it to a recycling center or an auto parts store.
How Often Should You Change Your Oil?
The frequency of oil changes depends on your vehicle’s make, model, and driving conditions. For many cars, the standard recommendation is every 3,000 to 5,000 miles. However, newer cars often have longer intervals, sometimes up to 7,500 or even 10,000 miles, thanks to advancements in engine and oil technology. Always consult your vehicle’s manual for the manufacturer’s specific guidelines.
Environmental Considerations of Oil Disposal
Changing your oil at home comes with a responsibility to the environment. Used motor oil is considered hazardous waste and can harm ecosystems if disposed of improperly. Many auto parts stores or recycling centers accept used oil, filters, and other car-related waste. Be sure to collect your old oil in a sealable container and take it to a certified disposal location. Never pour it down drains or into the ground.
Benefits of a DIY Oil Change
One of the biggest advantages of changing your oil at home is the cost savings. A DIY oil change can cost significantly less than having it done at a professional service center. Additionally, performing the oil change yourself gives you control over the quality of oil and parts you use. It also provides a sense of satisfaction in taking care of your own vehicle, enhancing your understanding of car maintenance and potentially catching other issues during the process.
FAQs
How long does it take to change your oil?
Changing your oil usually takes between 30 and 60 minutes, depending on your experience and familiarity with the process.
Can I use any type of oil in my car?
No, always refer to your vehicle’s manual to determine the correct type and grade of oil to use. Different cars require specific types of oil.
Do I need to change the oil filter every time?
Yes, it’s recommended to replace the oil filter every time you change the oil. The filter traps debris and contaminants, and a clogged filter can reduce engine performance.
What should I do with the old oil?
Used motor oil should never be disposed of in the trash or down the drain. Take it to a local recycling center or an auto parts store that accepts used oil for proper disposal.
Can I overfill my engine with oil?
Yes, overfilling can cause the oil to foam and lead to engine damage. Always follow the manufacturer’s oil quantity recommendations and use the dipstick to check levels after adding oil.
How do I know when my oil needs changing?
Most vehicles have an oil change indicator light, but you can also manually check the oil using the dipstick. If the oil appears dirty or low, it’s time for a change.